One of the best ways to improve your gaming PC’s performance is by adding more RAM. By doing so, your PC’s processing speed increases which allow your game to run more efficiently and smoothly. But if you don’t have any idea on how to add RAM to your gaming PC, here’s a guide on how to purchase RAM modules and install them in your unit.
How to Purchase new RAM for your gaming PC
- Know how much RAM is currently installed on your PC.
- Know how much RAM your PC can support.
- Identify which RAM format your motherboard supports.
- Check the speed of your RAM modules.
- Install your RAM in pairs.
- Know the difference between DIMM and SO-DIMM RAMs.
Here are things to consider when purchasing a new RAM for your gaming PC:
Step 1 – Determine how much RAM is currently installed on your PC.
Before you purchase RAM, you need to know first how much RAM is already installed in your gaming PC. To check your installed RAM, go to the System Properties window. Your installed RAM should show in the System section.
Step 2 – Know how much RAM your PC can support.
Know how much RAM your PC and operating system can support. A 64-bit version can support up to 128GB RAM. But this doesn’t mean that you should, especially if your motherboard can’t support that much RAM. So run an online system scanner to see how much RAM your motherboard can support.
Step 3 – Identify which RAM format your motherboard supports.
Know what RAM format your motherboard supports. The standard for most systems now is DDR4 RAM.
Step 4 – Check the speed of your RAM modules.
Remember that RAM comes in a variety of different speeds. Remember that all installed RAM should have the same speed so it can deliver the best performance.
Step 5 – Install your RAM in pairs.
It is better if all RAM should be installed in pairs. If you are installing 16GB of RAM, install two 8GB modules or 4GB modules.
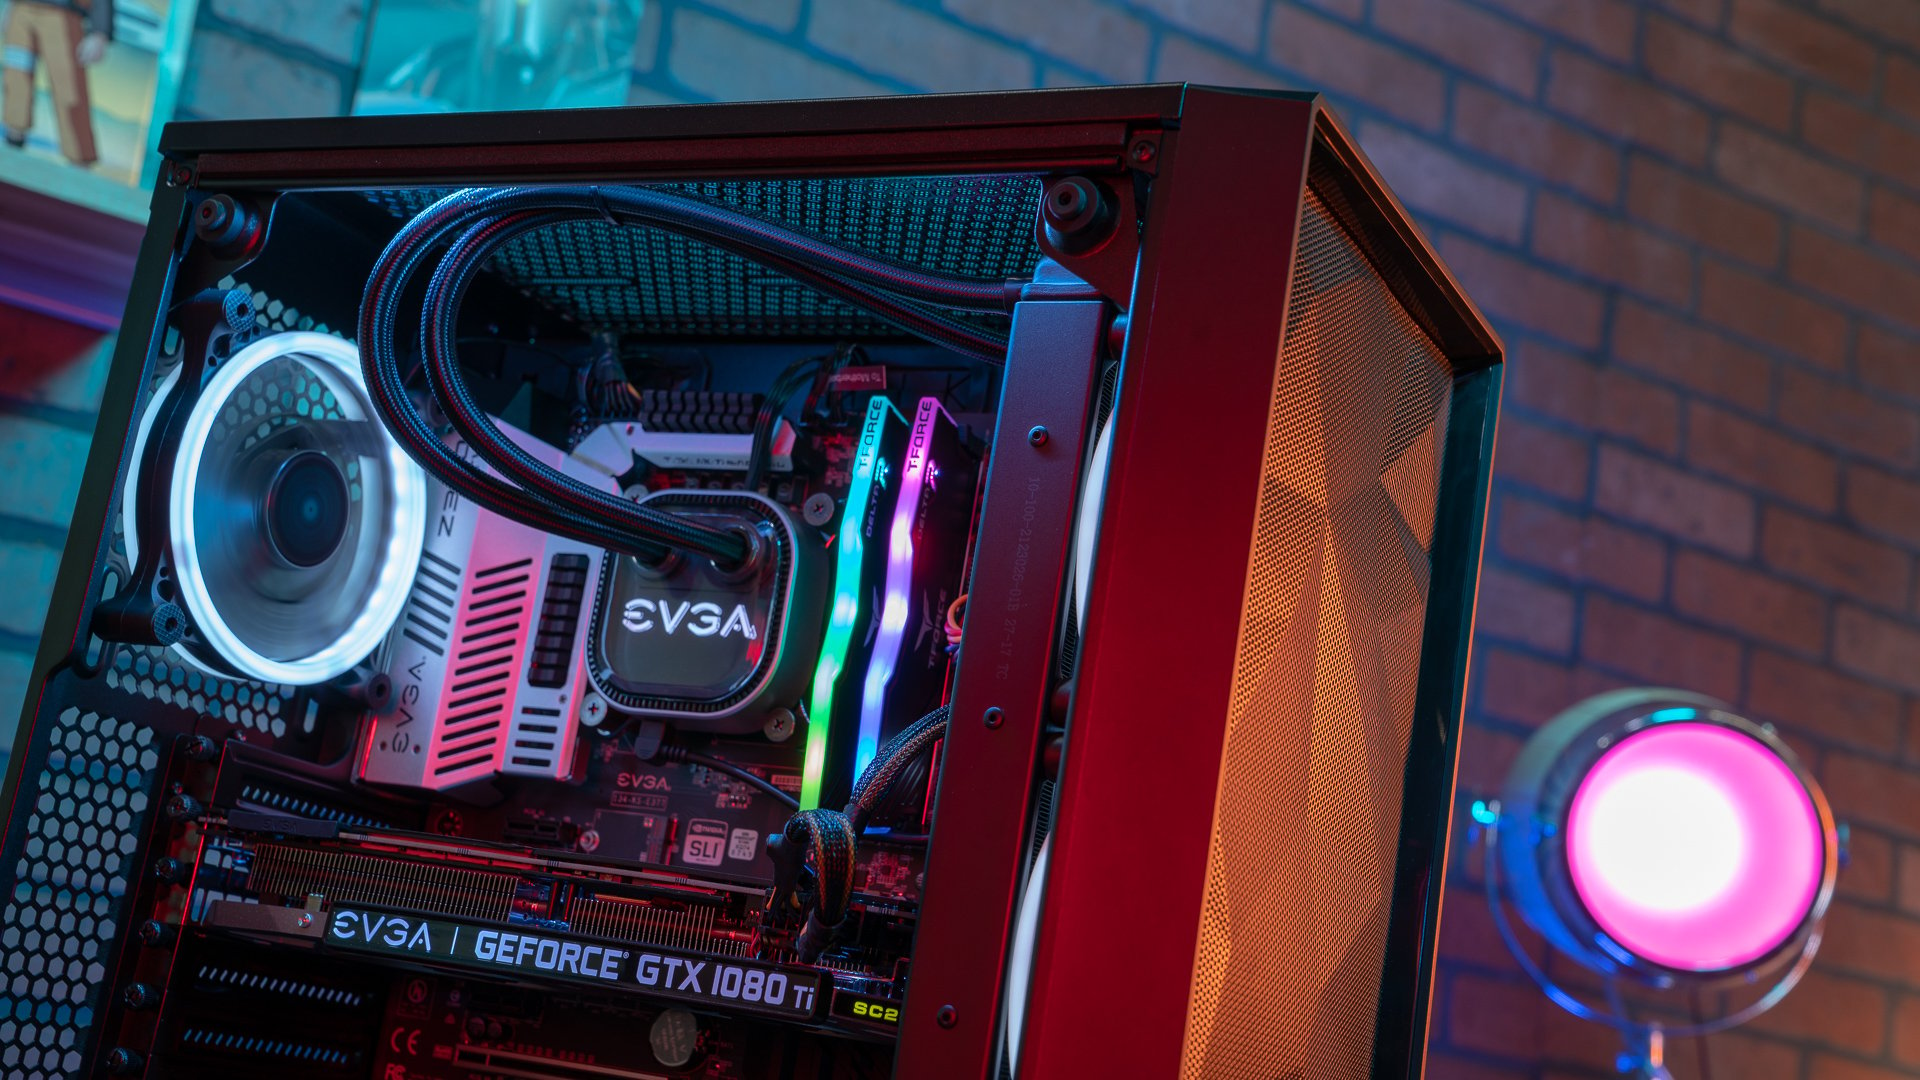
Step 6 – Know the difference between DIMM and SO-DIMM RAMs.
Make sure to know the difference between desktop and laptop memory. Most desktop gaming PCs use DIMM RAM, while laptops use SO-DIIM, which is smaller. So be sure that you are buying the right type of RAM.
Installing your new RAM in your gaming PC.
- Power off your computer.
- Open your CPU case to access the motherboard.
- Use an anti-static wrist strap to avoid damaging your CPU components.
- Remove your old RAM modules.
- Double-check the labels of your RAM slots.
- Install your new RAMs in their slots.
- Close your computer.
- Turn on your computer.
- Make sure that the RAM is recognized.
Here’s how to install a new RAM in your gaming PC:
Step 1 – Power off your computer.
Turn off your computer, then unplug the power cable. Wait for your PC to cool down. If you have to move your CPU to access it earlier, remove all the cables at the back. Then place your CPU on the side to give you easy access. Make sure to lay it down with the ports on the back closest to the table.
Step 2 – Open your CPU case to access the motherboard.
Carefully open the case. Remove the screws and slide the panel off or pull it open. Make sure that you are removing the panel which will give you access to the motherboard. Determine which panel you need to remove by looking for input/output ports on the back of your CPU.
Step 3 – Use an anti-static wrist strap to avoid damaging your CPU components.
Remember that when working with your CPU, you have the risk of emitting any electrostatic discharge, which can damage your components. So to reduce this risk, wear an anti-static wrist strap.
Step 4 – Remove your old RAM modules.
Remove the existing RAM by popping out all the old modules. Press down on the latches on each end of the RAM module. By doing this, the RAM module should pop out of the slot, which will allow you to lift it out.
Step 5 – Double-check the labels of your RAM slots.
Check the RAM slots. Most motherboards have four slots for RAM, but the pairs are installed directly next to each other. So make sure to double-check the labels on each RAM slot.
Step 6 – Install your new RAMs in their slots.
Install the RAM. Get your new RAM module and carefully push it directly into the slot. Make sure that the notches at the bottom will line up. Apply even pressure to the top of the module until the RAM is inserted. The latches should snap into place on each side. And make sure not to force the modules in, or it may break them.
Also, remember that all RAM should be installed in pairs. As it may be difficult for your computer to run with a single RAM stick. Aside from that, using only one stick can decrease your PC performance.
Step 7 – Close your computer.
Once the RAM is installed and securely locked in place, close up your computer. Make sure to screw the case panel back into its place. Reconnect all the cables back in and plug your computer.
Step 8 – Turn on your computer.
Power up your computer and allow your operating system to boot. You may be prompted to continue due to the new RAM installation.
If ever your PC runs into an error, it may be because the RAM is improperly installed. There may also be errors caused by one of your new modules.
Step 9 – Make sure that the RAM is recognized.
Once that, your operating system is completely booted up. Go to your system information to verify if the RAM is properly installed and is being used. Double-check if the amount of RAM is being displayed correctly.